Make your mark on this fantastic open-source firewall and router software
Note: These instructions apply to pfSense® v2.1.4-2.2.6 only.
 Ever wanted to take the pfSense®
software and make it your own?
Want to offer your clients a full-featured firewall and router package as part of your service offerings?
Well, here’s an overview of the steps you’ll need to take to replace the pfSense® branding with your own.
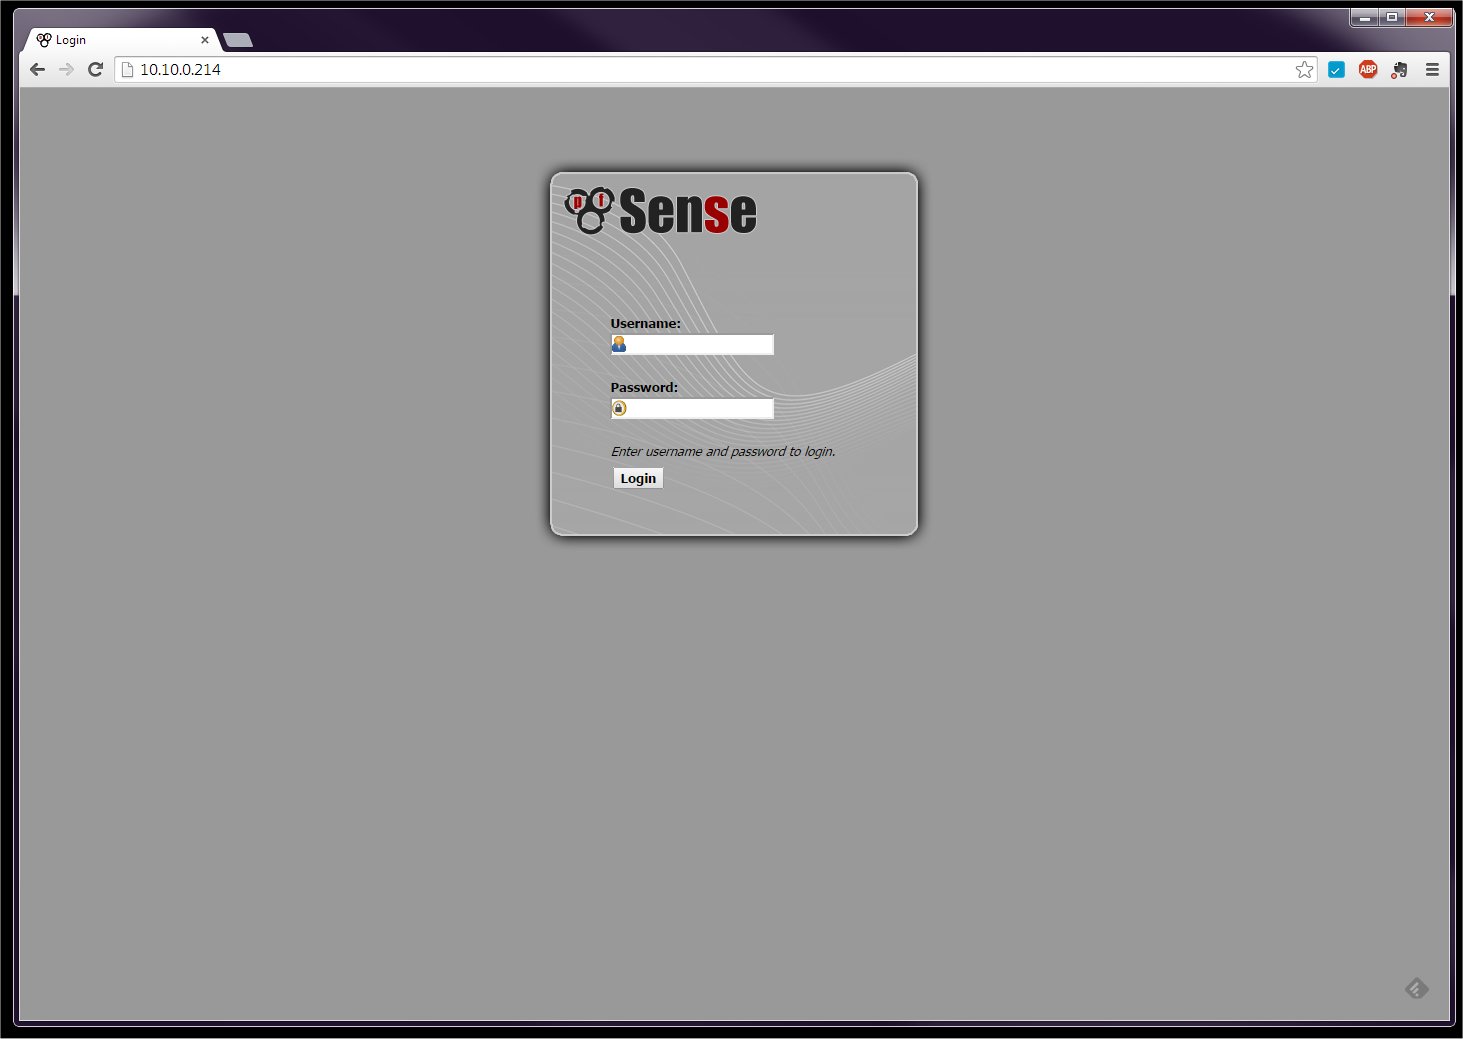
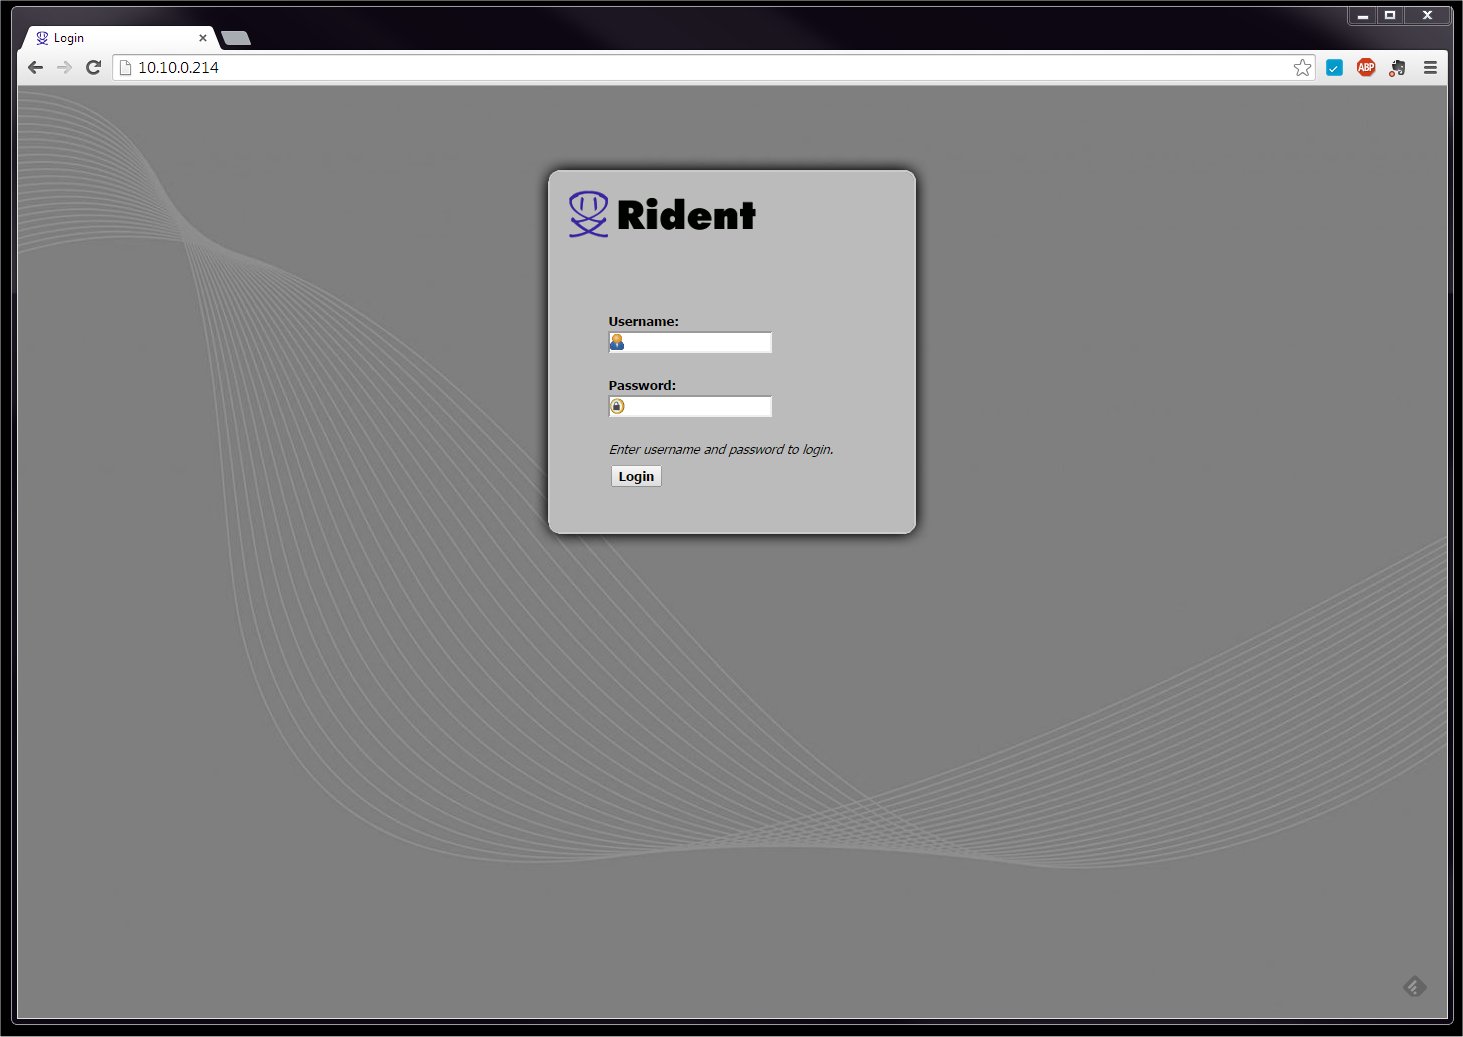
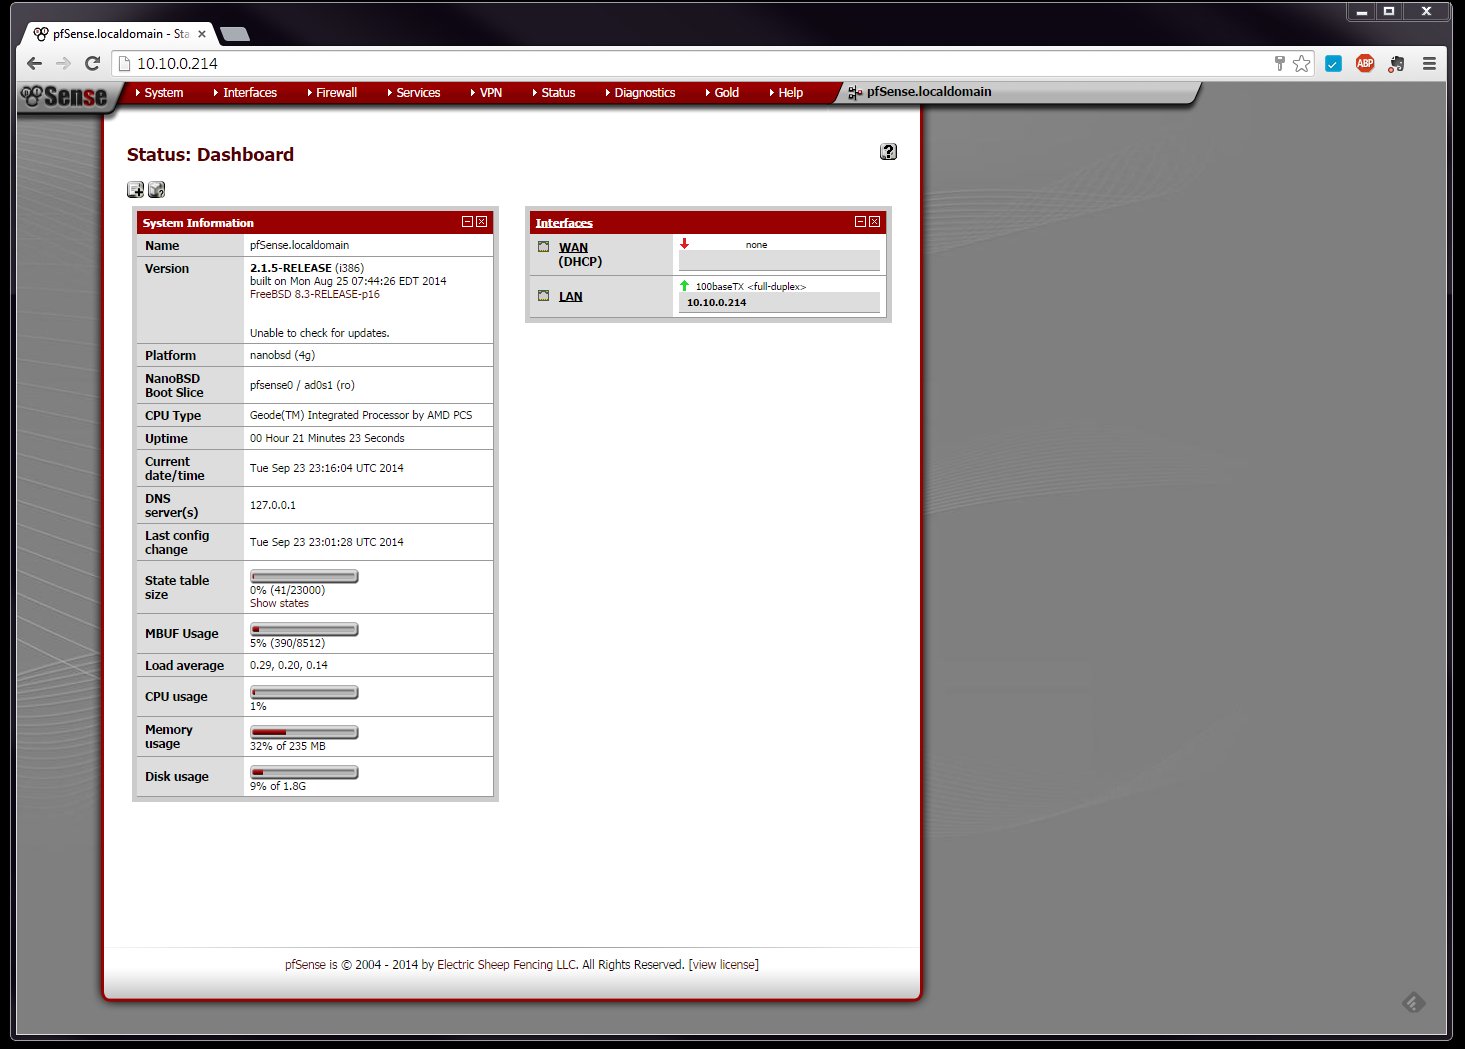
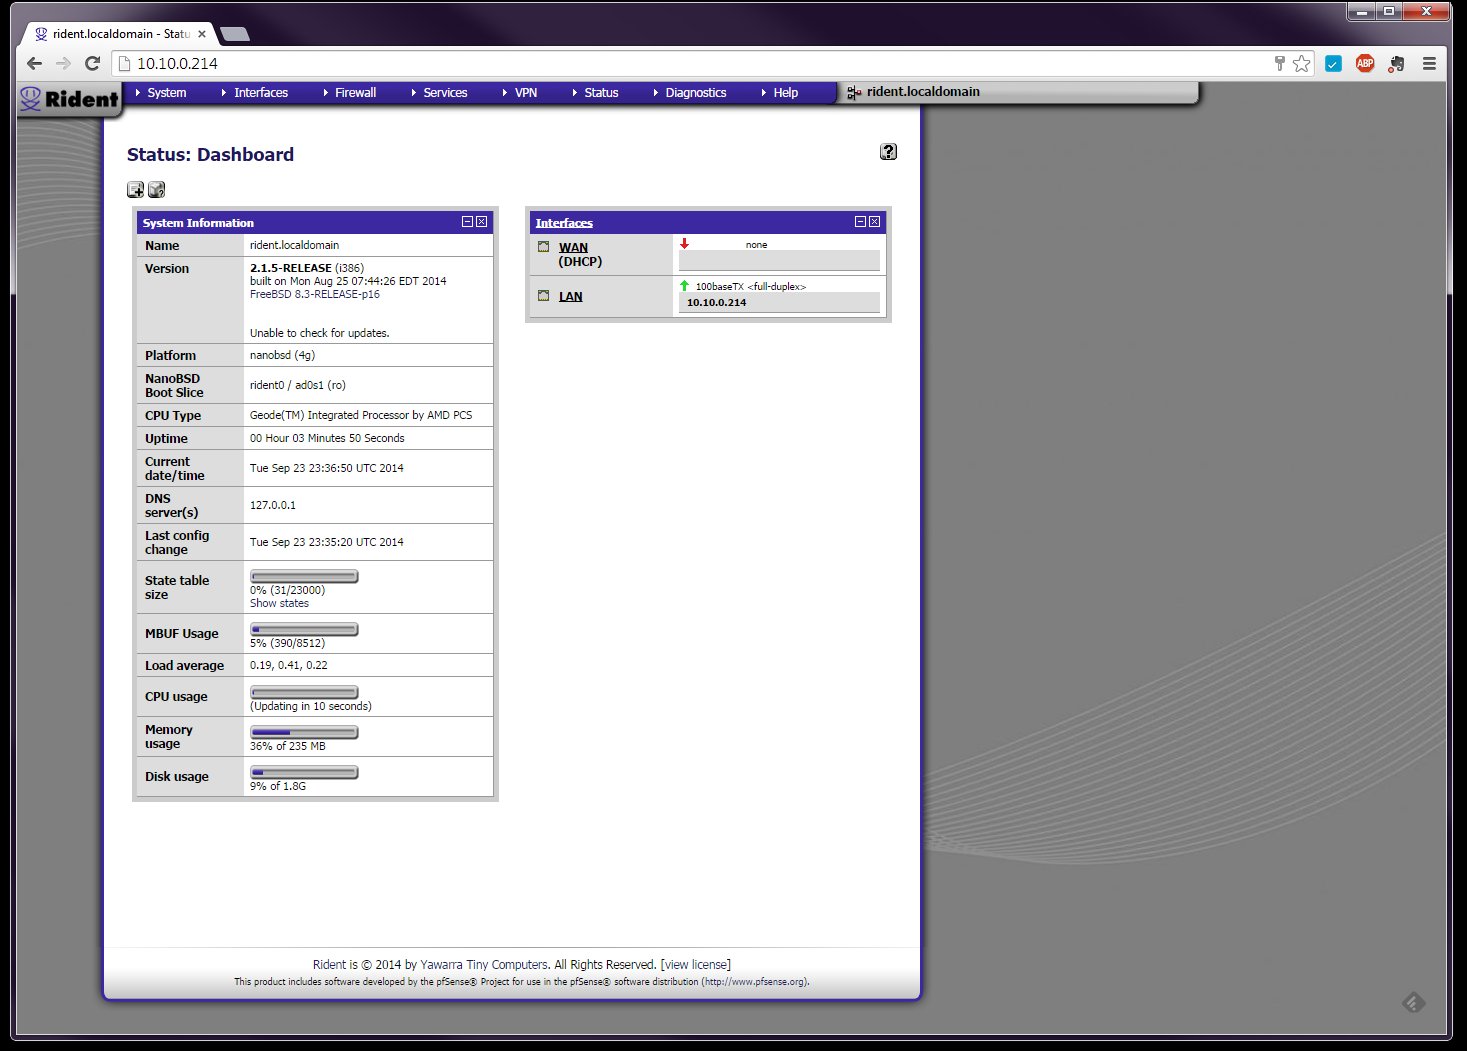
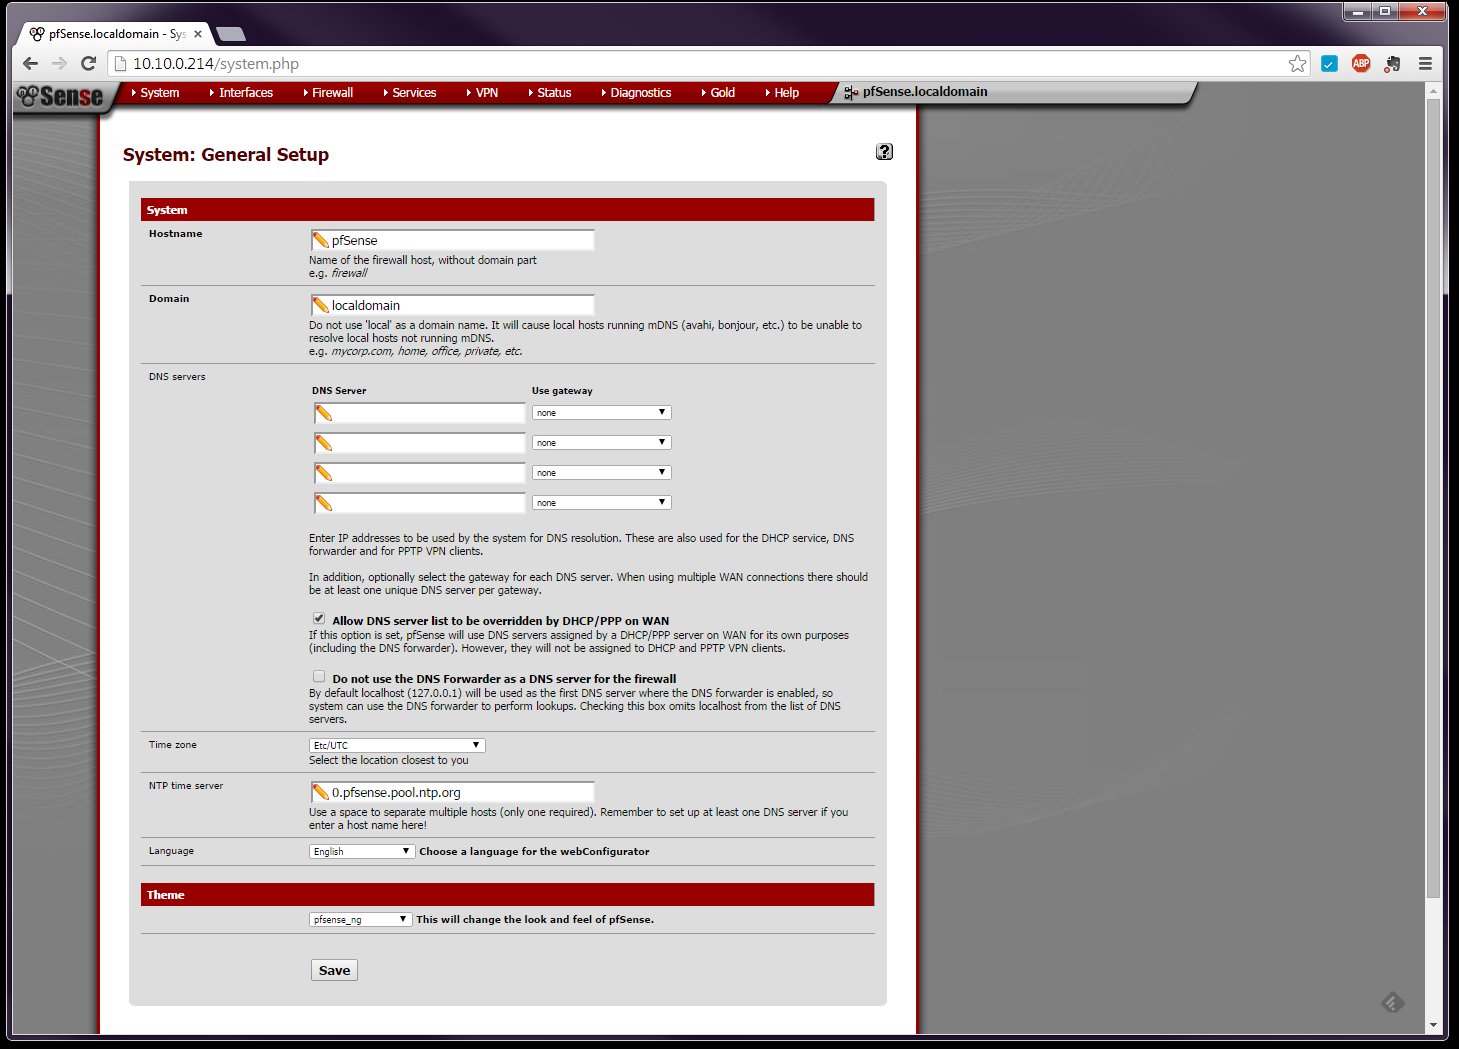
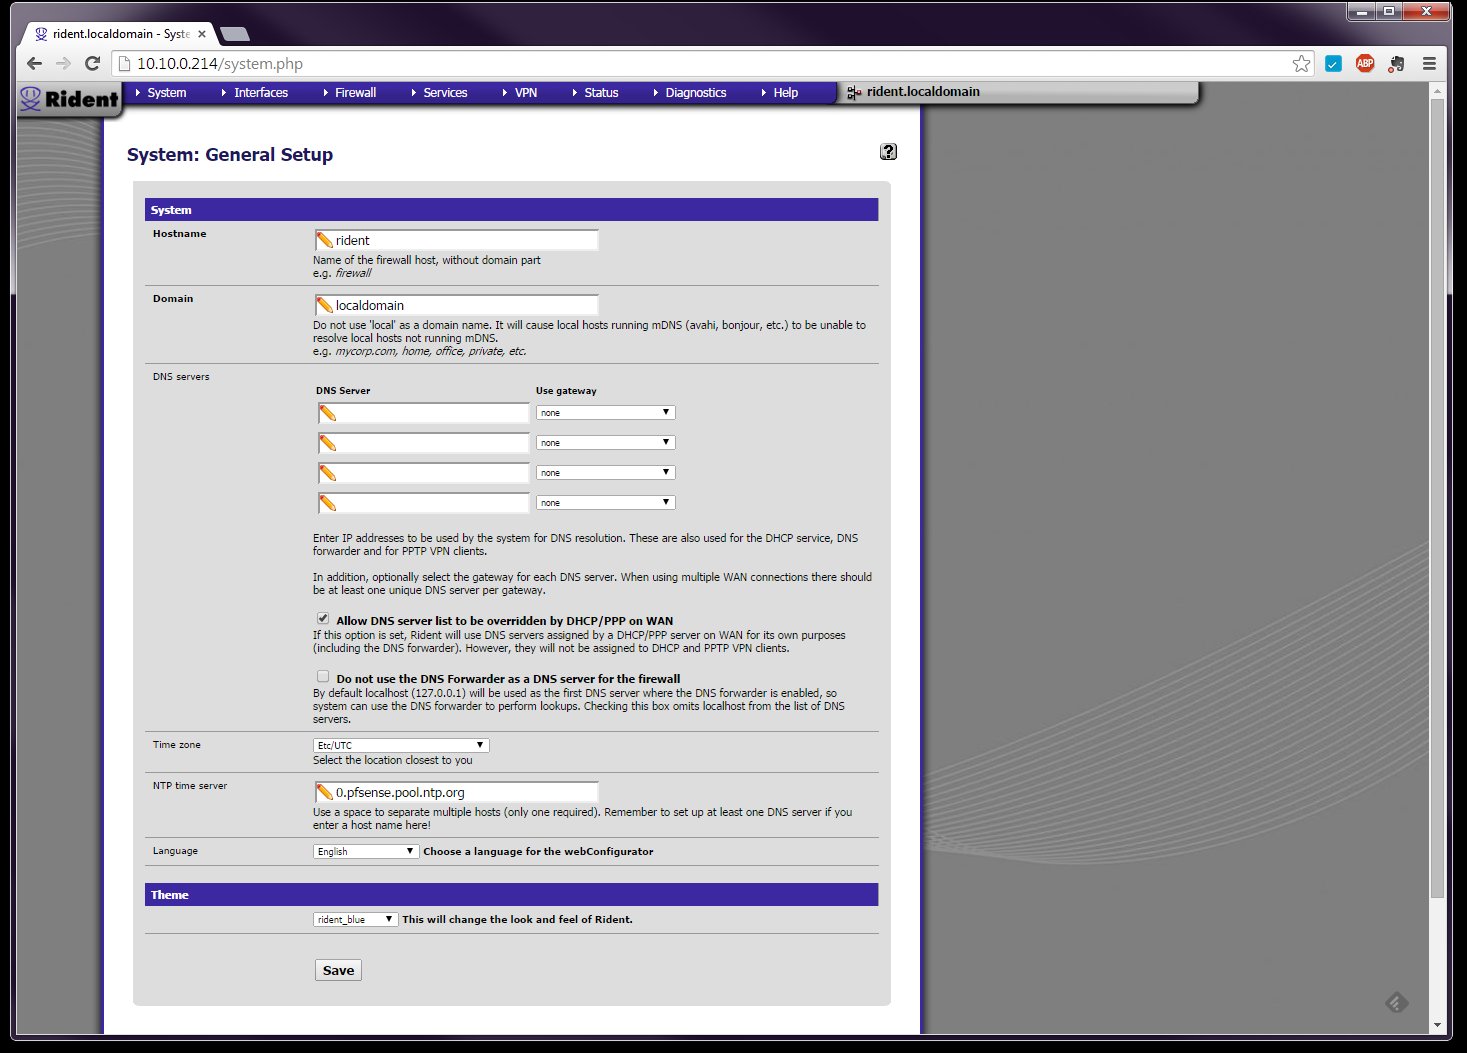
To get an idea of what’s possible, take a look at these before and after screenshots, comparing the standard pfSense® software interface with our rebranded Rident™ version.
These instructions are for modifying the standard nanoBSD pfSense® image as released by the pfSense® project, and require no special tools or access to pfSense® source code or repositories.
All you need is:
- your favourite text editor (we love EditPlus)
- your favourite binary editor (we love EditPad)
- your favourite image editor (we love GIMP)
- and the ability to transfer files back and forth between your pfSense® box and your local network or machine
Ready? Set? Let’s go!
Step 1. Install the pfSense® software
Before you can do anything, you’ll need to get pfSense® installed on your box.
You can follow our tutorials:
or just do whatever you’d normally do to get your software loaded and ready.
Remember, in order to get pfSense® working on your chosen hardware, you may need to:
- Assign interfaces
- Create a loader.conf.local file
Step 2. Create a new look for the pfSense® system
2.1 Duplicate the pfsense_ng theme
To make things easy on ourselves, we duplicated the most recent pfsense_ng theme, and used this as the base for our modifications.
This not only saves time, but also ensures that we’re working with a theme that is designed to work with all of the latest features of the pfSense® software.
The simplest way to duplicate the theme is:
- Copy it off your box, onto a machine on your local network, using scp or something similar.
- Duplicate the pfsense_ng folder and give it a new name – something that will suit your business or branding.
Note: Only use numbers, letters or underscores in the new directory name. No spaces, hyphens or other special characters. For the purposes of our example, we’ll call our new theme directory ‘new_theme’.
2.2 Replace the pfSense® logo
There are nine image files that contain the pfSense® logo, that you will need to replace with equivalent images containing your logo.
Seven of them are in the theme directory, and two of them are in the web root.
Theme directory
/themes/new_theme/apple-touch-icon.png (57 x 57)

/themes/new_theme/favicon.ico (32 x 32)

/themes/new_theme/images/icons/favicon.ico (32 x 32)

/themes/new_theme/images/logo.gif (200 x 56)

/themes/new_theme/images/logobig.jpg (363 x 102)

/themes/new_theme/images/header.png (900 x40)

/themes/new_theme/images/misc/logon.png (400 x 400)
Web root
/usr/local/www/favicon.ico (32 x 32)

/usr/local/www/apple-touch-icon.png (57 x 57)
2.3 Change the pfSense® theme colour (optional)
If you want to also change the main theme colour, there are an additional thirteen files that will need to be updated.
Images with dark red elements
/themes/new_theme/images/header.png (900 x40)*

/themes/new_theme/images/hostname.png (400 x 40)

/themes/new_theme/images/alerter.png (400 x 40)

/themes/new_theme/images/alert_bgr.png (400 x 40)

/themes/new_theme/images/horizontal.png (840 x 10)

/themes/new_theme/images/new_tab_menu.png (226 x 70)

/themes/new_theme/images/footer.png (840 x 80)

/themes/new_theme/images/misc/bar_blue.gif (1 x 15)

/themes/new_theme/images/misc/bar_left.gif (5 x 15)
* Also contains logo
Icons with dark red background
/themes/new_theme/images/icons/icon_fw-update.gif

/themes/new_theme/images/icons/icon_check.gif

/themes/new_theme/images/icons/icon_error.gif

/themes/new_theme/images/icons/icon_exclam.gif
For the icons with dark red backgrounds, we recommend removing the dark red background entirely, making it easy to switch between colours.
CSS colours
There are three hex codes you’ll need to replace with your new colours in the following files:
/themes/new_theme/all.css

/themes/new_theme/graphlink.css

/themes/new_theme/login.css

/themes/new_theme/wizard.css

/themes/new_theme/styles/jquery-ui-1.11.1.css (v2.2)
and the hex codes are:
- Dark red – #990000
- Darker red – #850000
- Burgundy – #550000
2.4 Replace the pfSense® background (optional)
If you want to change pfSense® even more to make your own, you may want to replace the background image with something more suited to your branding.
/themes/new_theme/images/background.jpg (1500 x 800)
2.5 Update pfSense® theme file paths
There are some file paths hard coded into the pfSense stylesheets, so if you subsequently delete the ‘nervecenter’ theme, your new theme will break unless you update them in these files.
/usr/local/www/themes/new_theme/all.css

/usr/local/www/themes/new_theme/graphlink.css

/usr/local/www/themes/new_theme/login.css

/usr/local/www/themes/new_theme/wizard.css

/usr/local/www/themes/new_theme/javascript/transmenuC.js

/usr/local/www/themes/new_theme/javascript/transmenu.org
2.6 Upload the new theme
Once you’ve made all of your changes to your new theme, you’ll need to copy the entire theme folder back into the themes directory at /usr/local/www/themes/
You’ll also want to go to System > General Setup > theme, select new_theme and save your settings.
2.7 Delete the old themes (optional)
If you don’t want people to be able to change the look and feel of their install, you can either set the ‘disablethemeselection‘ flag to false in the globals.inc file, or you can simply delete all of the other subdirectories in the themes folder.
Step 3. Rename the pfSense® software
3.1 Edit the configuration via the WebGUI
Go to System > General Setup > hostname and edit the value to your new name.
You may also want to go to System > User manager and change the password for the admin user (the default is “pfsense”).
3.2. Edit files via WebGUI
There are some other files you’ll need to edit, and the easiest way to do this is through the WebGUI at Diagnostics > Edit file > Browse
globals.inc
Location: /etc/inc/globals.inc
Used: Lots of places
Change: Lots of settings, including product name, product URLs and more
pfsense-logo-small.txt
Location: /etc/ascii-art/pfsense-logo-small.txt
Used: On bootup, via the console, displays the pfSense logo and name
Changes: Replace the pfSense ascii art logo with a logo / message of your choosing.
beastie.4th
Location: /boot/beastie.4th
Used: On bootup on some platforms, via the console, displays the pfSense logo and name
Changes: Replace the pfSense ascii art logo with a logo / message of your choosing.
brand.4th
Location: /boot/brand.4th
Used: On bootup on some platforms, via the console, displays the pfSense name
Changes: Replace the pfSense ascii art name with a logo / message of your choosing.
rc.banner (Optional)
Location: /etc/rc.banner
Used: In the console, at the top of the menu
Changes: Add to or edit this message if required
3.3 Edit the Master Boot Record
The Master Boot Record is used to display the slice names on bootup, and these will still say ‘pfSense’.
If you want to change this, you will need to:
- Copy the pfSense® image off your storage device onto your local machine (using dd)
- Edit the image file that you’ve created with your favourite binary file editor e.g. EditPad
- Replace these bytes
70 66 53 65 6E 73 E5with the correct bytes for your new product name - Copy the edited image back onto your storage device (using dd)
Step 4. Tweak the image
4.1 Add or run yawarra_mfd.sh
This script is available for download from our operating system images page, and allows you to set your own “factory defaults” in your images.
You can add and edit this using either vi (in the console) or the file browser in the WebGUI.
4.2 Recreate mtree (optional)
Because you’ve modified the directory structure, it’s worthwhile rebuilding the BSD m-tree, so that any directories you deleted don’t reappear the next time you do an update.
You’re finished
And there you have it!
All the steps you need to go through to create a new look and feel for the pfSense® software, so you can offer a fully rebranded solution to your clients.
How cool is that?
Want more great articles like this?
Sign up for email updates and get them delivered straight to your inbox.
We'll also donate $5 to Voyage Linux, to support the ongoing development of this fantastic software.
Sign me up!Updates
28 Sep 2014 – Added before and after screenshots
15 Feb 2015 – Added beastie.4th, brand.4th and jquery–ui-1.11.1.css files
Photo courtesy of Pixabay



Need a before and after screenshot!
Hi Scott,
That’s a great idea, thank you. We’ll see if we can organise some for you!
Hi Scott,
I’ve added some screenshots for you. Hopefully they give you an idea of what’s possible.
I have problem. When I try to copy directory back to pfsense box with Winscp it won’t let me do it. I did check the permission it is 755. Please help.
Never mind. I did find the answer. It was nanobsd version so write was disable.
Thanks
Vic
Hi Vic,
I’m glad you figured it out and thanks for letting us know.
Hi
Thanks for the tutorial!
I have the same problem as vic said.
I can browse to the right directory with WinSCP but i can’t upload any files.
I recently updated my pfSense to the newest release and since then my previous theme was removed.
I can not remember how i got it working last time… can you help me?
thank you in advance
Hi Patrick,
Unfortunately I don’t know what you did last time to get it working, so I can’t help you there!
As Vic said, he found that his image was mounted “read only”, so that might be worth checking.
And as far as I know, the way that pfSense does its updates is by updating the other slice and switching you to it, so hopefully all of your customisations will still be available on the other slice if you need to recover anything.
It is possible to mount both slices at the same time, through the serial console (option 8 shell), which is also where you can set the filesystem to read/write. Make sure when you compare old and new versions that you compare with an unmodified old version to ensure you incorporate all the changes made to the new version by the pfSense team.
Hi, what file needs to be modified to edit the slice label…? I am unable to find the image you are talking about.
Regards, kumar
Hi Kumar,
In this step, we’re talking about the actual pfSense image itself. I’ve updated the instructions to make it clearer.
In order to edit the Master Boot Record, you need to dd the pfsense image off your device onto your local machine (which creates an image file) and use a binary editor to modify the bytes of this file and then dd it back onto your device.
Hope that makes sense.
Yeah, thanks. BTW, I need to do this stuff from my pfsense running on a Virtual Box…any thoughts..?
Secondly, I am loading the .img of pfsense and am unable to search for those strings in the boot loader files. No idea, where they reside.
Hi Kumar,
Editing the Master Boot Record is not for the faint-hearted – one wrong byte can completely mess up your image file!
Our instructions were deliberately general, to give you pointers about what needs to happen in each part of the process.
If you’re not sure what to do at any given point you can either decide to leave that particular feature unchanged, or find someone else to do it for you.
And we don’t have any experience running pfSense on Virtual Box, sorry.
please send me video tutorial or where i can download how Replace the pfSense® logo and replace it to my own my email is sammandaza@gmail.com
Hi Samestrange,
I’m sorry, but we don’t have a video on how to do that, and I’m not sure where to find one. This tutorial really is just supposed to be a starting point to get you going in the right direction. Please feel free to contact us if you’re looking for someone to provide a software customisation service for you.
hi Nikki,
just the help I was looking for to rebranding pfSense. I always wondered how one can customize the look and feel to fit inline with the organization’s branding. Now this tut is a great help to me.
thak you kindly
plustwo
Hi PLustwo,
You’re very welcome.
How to welcome to console pfsense name change?
Hi Sheron,
I’m not 100% clear which occurrence of “pfsense” you’re trying to change. Can you describe in more detail where you’re seeing the message you want to alter?
i need to change boot time press F1 pfsense and after come welcome pfsense how to change it
Dear nikki
i am re brand pfsense but how to change boot F1 pfsense name and welcome to pfsense in console black screen
Hi Sheron,
To change this text, you’ll need to edit both the Master Boot Record, as per Step 3.3 (above) and the rc.banner file, as per Step 3.2 (above).
If you’re not confident editing the Master Boot Record, I’d recommend either leaving this part, or finding someone who has experience with this kind of work.
Dear Nikki
where is master boot record path in pfsense? i am not clear to step 3.2
Hi Sheron,
This tutorial really is just supposed to be a starting point to get you going in the right direction. If you don’t already know your way around the Master Boot Record, then you risk corrupting your image file. Please feel free to contact us if you’re looking for someone to provide a software customisation service for you.
How would I edit the text on the initial login page that says “Enter Username and password to login”
When I view the page source, the page is named index.php.
The only places I’m finding index.php are below.
/usr/local/captiveportal/index.php
/usr/local/www/index.php
When I open /usr/local/www/index.php, it’s not the same file as when I view the source of the initial login page.
Any idea where I can find the correct file?
Hi Eric,
The file you’re looking for is /etc/inc/authgui.inc, and in particular, this line:
gettext("Enter username and password to login.");If there is any other text you can’t find, there are basically two places to look, /etc/ and /usr/local/www.
The way to find it is:
login to the shell (option 8)
cd /etcgrep -r "Text you are looking for" *
If that doesn’t give you results, try also:
cd /usr/local/wwwgrep -r "Text you are looking for" *
You could combine these by starting in / but then you’d also be searching a bunch of stuff you don’t need to.
The only text that will not show up in these searches is the O/S system name contained in the master boot record.
Hope this helps.
That worked perfect.
Thanks Paul!
First I want to say thank you!!!
I have one quick question regarding changing the color in dashboard like State table size, MBUF Usage, CPU usage, Memory usage… still red. Also the traffic Graph still red.
Hi Hydra,
You’re most welcome.
The colour of these bars are changed by editing two image files:
You should be able to change the traffic graph colours using CSS, for example
#traffic_graphs #lantrafficdiv #graph path#graph_in {stroke="000099";}although I haven’t actually tried doing this.
Hi Nikki
Great tutorial, this is just what i needed.
I have changed every thing but for two things :-/
first, and most important, the dropdown menus are still red.
second, when saving and getting the “apply” button, the box that it appears in have a red line in top and bottom.
Hi Uffe,
The red lines at the top and bottom of the box are changed in this file:
/usr/local/www/guiconfig.incI have just tended to replace #990000 with #FFFFFF to avoid having to change this colouring with each new theme, because it is hard coded outside of the theme, but you can set it to any colour you like.
If your menu is still red, chances are you haven’t updated the colours in this file:
/usr/local/www/themes/your_theme/all.cssIf that doesn’t work, you can find out where the background colours are coming from by using the “inspect element” feature (or its equivalent) in your browser, and selecting the “ul” and “li” elements of the menu, and finding the path to the file that is setting these colours.
How to upload image file to Hardware Box?
Hi Sreekumar,
You’ll need to use a program like dd to copy the image file off and onto the storage media in your box.
Hi Nikki
my i know how to change (pfSense is © 2004 – 2015 by Electric Sheep Fencing LLC. All Rights Reserved. [view license])how to edit .thx
Hi Andy,
The license information can be changed by editing the relevant code in this file:
/usr/local/www/license.phpYou may also want to edit the footer text and links in this file:
/usr/local/www/fend.incHello, and thanks for this tutorial… Is it possible create a new bootable iso with all made changes…
Hi Frank,
We’re no longer maintaining our custom version of pfSense as pfSense now works on our hardware out of the box.
If you want to discuss getting us to create a custom version especially for you, please send us an email.
Excellent work friends.
Thank you.
You’re most welcome!
This all has changed in pfSense 2.3 I believe.
Does anyone have and directions like this but for the pfSense 2.3 version?
Thank you… Rick
Hi Rick,
The look and feel of pfSense has changed significantly in 2.3, but the fundamental structure of pfSense hasn’t changed that much, so you could probably get a long way with these instructions and a bit of creativity.
We don’t have any plans at this stage to update these instructions to suit pfSense 2.3 specifically.
After I change /etc/inc/globals.inc and change pfsense name to my own name,, everything has chrash, due to some permission error.
Do you know how to edit file and give right permision to pfsense again ?
Hi Nedim,
There’s so many things that could have gone wrong, that it’s impossible for us to provide support for customisation of [pf].
I suggest you replace your edited globals.inc with an unmodified original copy of the file via scp or something similar, and see if that gets you working again.
Hi Friends,
Is there any video tutorial regarding this.
Please.
Hi Jeewandara,
We don’t have any videos for this tutorial, and we don’t plan to create them at the moment.
How exactly do you recreate mtree? Any examples online you can point me to?
Hi Larry,
Basically, you go in through the console, press 8 to get a shell and then change the system to read-write.
Then you type:
mtree -c -p / > /etc/installed_system.mtreeYou can get more info on the mtree command in the BSD manual.
any tutorial for pfsense 2.3.X
Hi Ghulam,
We don’t have any plans at this stage to update out instructions for pfSense 2.3.X.
Now that pfSense works on our hardware “out of the box”, we’ve put this project on the backburner.
Hopefully you can get enough of a general idea of what’s required to adapt the steps to your needs.
This sounds all great, but what is the full path to the themes directory? I can’t find it and i’m connected via WinSCP. I can’t do any of this if I can’t find the directory.
Hi Daniel,
I believe the themes are all via CSS now and would be in this folder: /usr/local/www/css
This post hasn’t been updated since version 2.1.4.
Sorry about that!
looking for someone to make a theme for me please contact me . its a bit urgent
Pfsense have changed logo mechanism.
Is there any tutorial to change Logo?
Hey, Greetings!
I have been successfully changing the logos and re-branding till version 2.3. But now (after version 2.4), non of the above methods work, Please guide me a little how to do it as I have no experience regarding css files. Thanks.