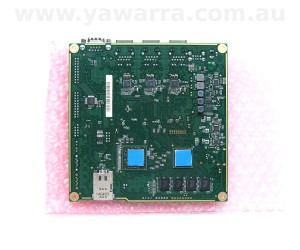
 One of the (many) cool things about the new APU board is that it offers a 64-bit dual-core 1GHz processor while still being fanless.
It manages this by using a heat spreader attached to the case or mounting plate which contacts the CPU and the south bridge via thermal conductive pads.
And it’s essential that you attach this heat spreader to the APU board before powering it on for the first time, to avoid damaging the board.
There are instructions on the PC Engines website on how to do this, but we’ve come up with an even easier way to do it, using a printable template.
Template: How to easily and accurately position the heat spreader on the APU
On this template, the large 152mm square represents either the underside of our APU mounting plate or the PC Engines case.
And the smaller internal rectangle represents the ideal position of the head spreader.
How to use this template to attach the heat spreader
Prepare the template
Print the template onto a piece of paper at full size, ensuring that the outer square measures 152.4mm in both directions (or as close as possible to that).
Glue the template onto a suitable piece of cardboard.
- The cardboard sleeve that the APU comes in is ideal for this purpose.
Cut around the outer rounded square with scissors or a craft knife.
Cut out the inner rectangle with scissors or a craft knife.
Punch holes through the circles in all four corners.
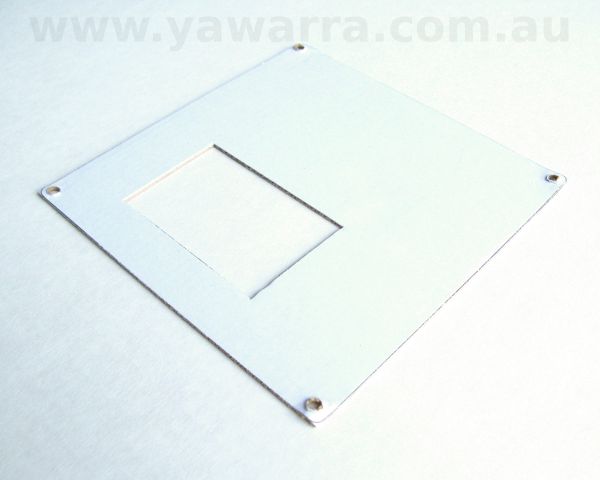
Position the mounting plate or PC Engines case in front of you.
- If you’re using our APU mounting plate, the orientation doesn’t matter.
- If you’re using the PC Engines case, position the case so that the port holes are facing up (i.e. at the top).
Slide all four holes in the template over the standoffs on the mounting plate or case.
- The edges of the template should line up with the edges of the mounting plate or case.
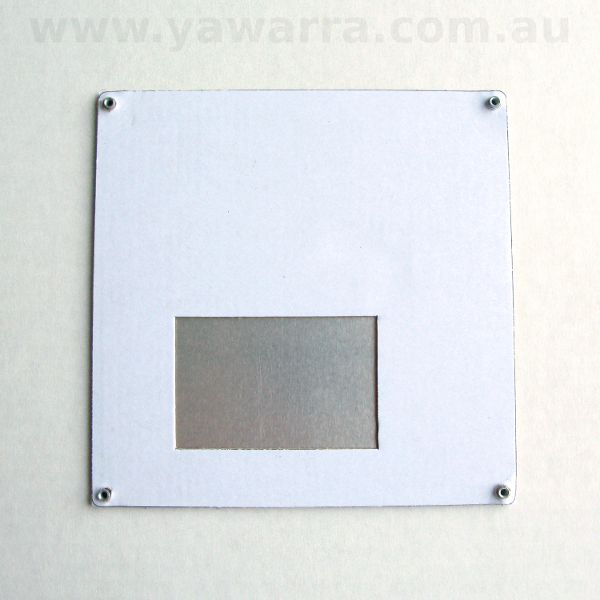
Attach the heat spreader to the case or mounting plate
Pick up the heat spreader plate and peel off the blue plastic backing.
- The idea is to stick the heat spreader to the mounting plate or case.
Hold the heat spreader by the long edges, with the sticky side down, using your thumb and index finger.
Place one of the short edges onto the mounting plate or case within the internal rectangle, about 1mm away from the cardboard.
Lower the rest of the heat spreader down gently, making sure to keep it aligned with the template on the way down.
- There should be a 1mm gap around the heat spreader, between it and the cardboard template.
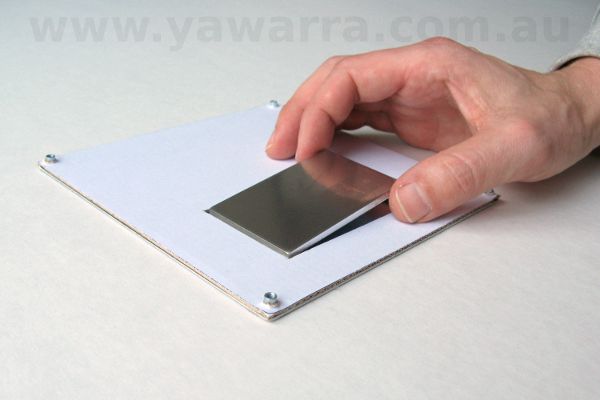
Lift the cardboard template off the mounting plate or case and discard it (unless you plan to use it again).
Prepare the APU board
Take your APU board out of its anti-static bubble-wrap bag, and place it upside-down on top of the bubble-wrap bag with the ports facing away from you (i.e. at the top).
- Make sure to observe normal anti-static precautions at all times while handling your board.
Take one of the two small blue square thermal conductive pads, and remove the clear backing.
Stick the pad to the CPU.
- It should cover the whole CPU
Remove the clear backing from the second square pad and stick it to the south bridge (the other chip).
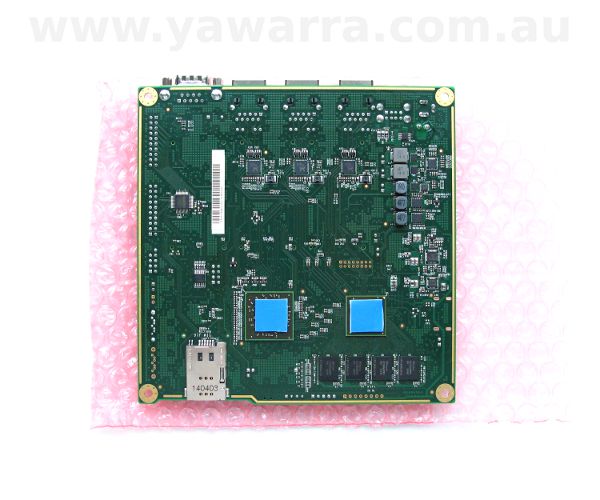
Peel the blue backing off the two square pads.
Attach the board to the heat spreader
Pick the APU board up and turn it over, keeping the ports facing away from you.
- The board should now be right-side up with the CPU facing down.
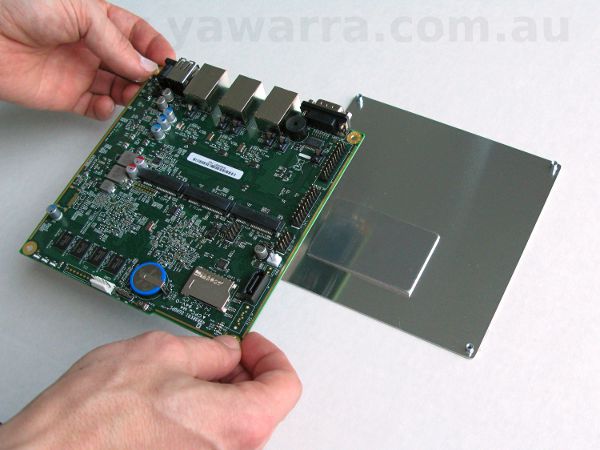
Lower the board gently onto the mounting plate or case, making sure to line up the screw holes in the corners of the board with the four standoffs on the mounting plate or case.
Gently press on the board, in between the wiring for the CPU and south bridge.
- This will ensure that the thermal conductive pads are firmly attached to the heat spreader.
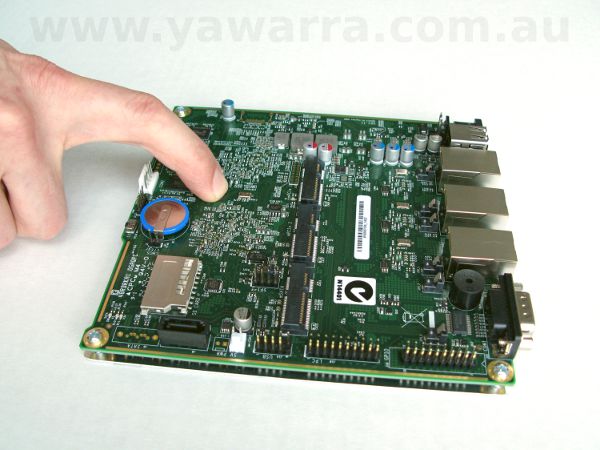
Screw the board to the mounting plate or case, using the four standoffs in the corners.
- This will prevent any movement of the board relative to the thermal pads or heat spreader.
- The APU board is now permanently attached to the heat spreader, and should not be removed.
Finish assembling the APU board into your enclosure.
Your APU board is now ready to use.
Now wasn’t that easy?
Have an awesome day!
Want more great articles like this?
Sign up for email updates and get them delivered straight to your inbox.
We'll also donate $5 to Voyage Linux, to support the ongoing development of this fantastic software.
Sign me up!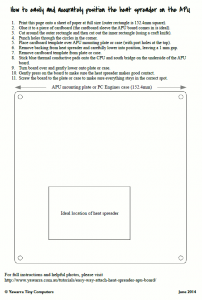


Instead of punching holes in the corners of the template to clear the case standoffs, I just cut the corners off at a 45 degree angle far enough into the template to clear the standoffs completely.
The alignment of the template in actual use will then be accomplished by the edges of the template against the inside walls of the case bottom.
Hi Frederick,
That’s a great idea, and it makes the template even simpler to construct. Thanks for the suggestion.
I also skipped gluing the template to cardboard as I’m using it only once and ordinary printer paper is durable enough for that use case.
Thanks again for the template!
Thanks for this tutorial.
Is the mounting plate available or did you built it by yourself?
My idea is to install the APU in a system where the external enclosure cannot be attached to the heat spreader.
Hi,
The mounting plate is something we make for use with our enclosures, so although it is not listed separately on our website, we can sell you one. Please email us for more details.
Thanks Paul,
so basically you use it for this enclosure
https://www.yawarra.com.au/shop/cases/apu-1-alix-2-bookshelf-case/
where the APU slides inside the enclosure?
Is the APU cooling using the mounting plate closed in the enclosure still ok?
I thought that the contact with the outside enclosure was necessary to achieve the correct APU working temperature.
The mounting plate has contact with the outside aluminium enclosure along two internal edges, without any intervening insulator, and due to the excellent heat transfer characteristics of aluminium, it kind of is in contact with the entire outside enclosure. We haven’t had any issues with overheating using this method. Since we haven’t enclosed the board and plate thermally (by placing any type of insulator between it and the outside), I can’t really tell you whether that would work, but I suspect not. The heat has to go somewhere, so unless your enclosure is large-ish, a more direct transfer mechanism is probably wise.