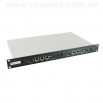
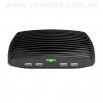
So you’ve got your hands on the feature-packed, super-tiny APU board, and now you want to do something useful with it?
What better choice than to install the pfSense® open-source firewall and router software?
Follow along step-by-step as we show you how to install the pfSense® software onto an APU board, using either:
- The standard pfSense® embedded image
- Our Rident™ software image, which is based on the pfSense® software with enhancements so it works “out of the box” on the APU
Installing the pfSense® embedded image
Step 1. Download the image
Go to the pfSense® website.
Click the big red ‘Download’ button.
Click on the link in the section titled ‘New Installs’ that takes you to a form titled ‘Download Full Install’.
Under ‘Which image do I need?’, select the following options:
- Computer architecture: AMD64 (64-bit)
- Platform: Embedded (NanoBSD)
- Console: Serial
- CF card size: To suit your media
Notes
- For the CF card size option, choose the size that matches your media.
- If your media is above 4GB in size, just use the 4GB image.
- Some media (especially SanDisk) claim certain sizes but use “small” GB (ie 1000K = 1MB and 1000MB = 1GB), so the image may not fit onto your media, even though they are supposed to be the same size. If this happens, just use the next image size down.
Once you have made your selection, a list of mirrors will appear.
Choose the closest one to you (or a random one) and save the image file to your local computer.
Step 2. Get the image onto the APU
Copy the pfSense® software image onto your SD card or mSATA drive.
Using Linux
If you’re using a Linux machine to copy the image, use dd with the following command.
gunzip -c pfSense-2.1.3-RELEASE-4g-amd64-nanobsd.img.gz | dd of=/dev/sdc bs=4M
Important
- Modify the file name to suit the image file you have downloaded.
- /dev/sdc will vary depending on how your system is set up. It could be /dev/sdb, or /dev/sdd, or /dev/sde
To find out type
fdisk -l
This will give you a list of the disks your system knows about.
Look for one that is the same size as your SD card.
Using Windows
If you’re using a Windows machine to copy the image, use phydiskwrite with the following command.
physdiskwrite -u pfSense-2.1.3-RELEASE-4g-amd64-nanobsd.img.gz
Important: Modify the file name to suit the image file you have downloaded.
Insert your SD card or mSATA drive into the APU board.
Step 3. Boot the APU
Connect to the serial console on the APU and set your terminal speed to 9600 baud.
Apply power to the APU.
Important
- When powering up the APU, ensure that the power is turned off at the switch before plugging in the power supply to the board.
- Similarly, when powering down the APU, ensure the power is turned off at the switch before removing the power supply plug from the board.
- This is to minimise the chance of arcing, which may damage your board, as the APU is very sensitive to voltage variations.
Ignore the garbage that you see.
- This garbage appears because the APU is set to 115200 baud. This setting can’t be changed, but the garbage can be safely ignored, and eventually it will stop.
Wait for the garbage to stop, and the following text to appear
Booting [/boot/kernel/kernel]
Press CTL+C (Control + C) to interrupt loading and get the boot loader prompt.
- Interrupting the boot loader at the right point is literally hit and miss.
- So if your box continues to boot, power it off and try again.
Step 4. Get the pfSense® software to boot
At the prompt (OK), for an SD card, type
set kern.cam.boot_delay="10000"
or for an mSATA drive, type
set hw.ata.atapi_dma="1"

set hw.ata.ata_dma="1"

set hw.ata.wc="1"
then type
boot
Wait for the box to go through the boot process, until you see the following message
Default interfaces not found -- Running interface assignment option.
Step 5. Assign interfaces
You’ll need to assign interfaces at this point.
When it asks you if you want to set up VLANs, type ‘n’.
And then assign the interfaces as follows
- WAN to re0
- LAN to re1
- OPT1 to re2
When it asks if you want to proceed, type ‘y’.
The pfSense® system should now boot correctly, and take you to the usual console menu.
Step 6. Create local config file
Before you do anything else, you need to create a loader.conf.local file to avoid the APU from hanging the next time that you reboot.
This file will contain the necessary code to allow the pfSense® system to boot correctly without needing intervention from you.
Note
- There are actually two copies of the pfSense® software in the image, so you will need to create this file on both slices.
To create this config file, you have two choices:
- Use the webGUI
- Use the command line and vi
Option 1 – Create config file via the webGUI
Slice 1
Log into the webGUI (at 192.168.1.1).
Go to Diagnostics > Edit File
In the ‘Save/Load from path’, type
/boot/loader.conf.local
Then in the box below, if you’re using an SD card, type
kern.cam.boot_delay="10000"
or if you’re using an mSATA drive, type
hw.ata.atapi_dma="1"

hw.ata.ata_dma="1"

hw.ata.wc="1"
and click ‘Save’.
Halt the pfSense® system and prepare to configure Slice 2.
Slice 2
Set your console speed to 115200.
Apply power to the APU.
When it says
1 pfSense

2 pfSense

F6 PXE

Boot: 1
Press 2 to load the second slice.
If you’re fast, you can change your serial console speed at this point to 9600 in order to interrupt the boot loader.
If you miss it or don’t want to try and change speed mid-console, turn the power off, change your console speed to 9600 and power up the APU again.
Wait for the garbage to stop and interrupt the boot loader with CTL+C as before (Step 3).
The boot loader automatically remembers which slice you loaded last time, so it will load Slice 2 this time and you can repeat Step 4.
You don’t need to repeat Step 5 because the interfaces have already been assigned.
Go back to the instructions for Slice 1 (Step 6) and repeat the process to create a loader.conf.local via the webGUI for Slice 2.
You can switch back to Slice 1 using the above process, or just keep using Slice 2 – they’re identical and it doesn’t matter which one you use.
We always configure our boxes to use Slice 1 by default to minimise confusion.
Option 2 – Create config file via the command line
From the console menu, press 8 to get a shell prompt.
To put the disk into read-write mode, type
/etc/rc.conf_mount_rw
To create the config file and begin editing it, type
vi /boot/loader.conf.local
Press ‘i’ to get into insert mode.
To set the boot delay for an SD card, type
kern.cam.boot_delay="10000"
or to enable DMA and write caching for an mSATA drive, type
hw.ata.atapi_dma="1"

hw.ata.ata_dma="1"

hw.ata.wc="1"
Press escape to get out of insert mode.
Type :wq to write the file and quit.
Go out of read-write mode by typing
/etc/rc.conf_mount_ro
Mount the second slice, which has a second copy of the pfSense® software, by typing
mount /dev/ufs/pfsense1 /mnt
Copy the file you created previously, by typing
cp /boot/loader.conf.local /mnt/boot/loader.conf.local
Unmount the second slice by typing
umount /mnt
To exit the shell, type
exit
And you should now be back at the console menu.
Step 7. Start using the pfSense® software
Your pfSense® system is now ready to configure and use.
From now on, whichever slice you boot into, it should load without hanging, and your changes will persist across upgrades.
Installing the Yawarra Rident embedded image
If you’d like an easier way, you can download and use our Rident™ images, which are based on the pfSense® software and have these changes already made for you:
- The ethernet ports are pre-assigned
- It doesn’t hang during boot (it already has the loader.conf.local file on both slices)
- It resets to our factory defaults (and you can set set your own defaults too)
The Yawarra Rident™ firewall and router software for embedded servers, is a modified version of the pfSense® software, optimised to suit our hardware.
How to install our Rident image on the APU
Download the embedded image from our operating system images page.
Save the image file to your local hard drive.
Copy the Rident™ image onto your SD card or mSATA drive.
Using Linux
If you’re using a Linux machine to copy the image, use dd with the following command.
gunzip -c rident213_4GB_APU.img.gz | dd of=/dev/sdc bs=4M
Important
- Modify the file name to suit the image file you have downloaded.
- /dev/sdc will vary depending on how your system is set up. It could be /dev/sdb, or /dev/sdd, or /dev/sde
To find out type
fdisk -l
This will give you a list of the disks your system knows about.
Look for one that is the same size as your SD card.
Using Windows
If you’re using a Windows machine to copy the image, use phydiskwrite with the following command.
physdiskwrite -u rident213_4GB_APU.img.gz
Important: Modify the file name to suit the image file you have downloaded.
Insert your SD card or mSATA drive into the APU board.
Power up the APU and either connect to the serial console (at 9600 baud) or go straight to configuring Rident™ via the webGUI at 192.168.1.1
How easy was that?
Or get us to do it
If that all sounds too hard, then you can always get us to pre-install Rident™ for you when you buy an APU server or an SD card from us.
And have fun playing with the pfSense® software on your APU!
Want more great articles like this?
Sign up for email updates and get them delivered straight to your inbox.
We'll also donate $5 to Voyage Linux, to support the ongoing development of this fantastic software.
Sign me up!


Thanks for the guide! However, I really shot myself in the foot by I just copying the kern.cam.boot_delay setting from this web page into the pfSense GUI. The reason is that you’re using typographic quotes on the web site, which caused pfSense to choked on the next reboot. That was a nasty one to fix…
Hi Michael,
Firstly, a big, BIG apology for the SNAFU on our part. The problem has now been fixed and the quotes in the code should copy and paste correctly.
Secondly, thank you for letting us know so that we can fix it for everyone else.
Thirdly, pfSense doesn’t care either way about the quotes, so you can also leave them out entirely if you’d prefer (although I realise that’s not much use to you now!)
Nikki
It is an awesome tutorial, my onli problem is that i cant stop the countdown
“Press CTL+C (Control + C) to interrupt loading and get the boot loader prompt.”
Is there another way to try to stop it?
Ok, i have found the problem. It was the usb to serial converter. But still i heave a problem when booting up:
“umass0: on usbus6
umass0: SCSI over Bulk-Only; quirks = 0x4001
umass0:0:0:-1: Attached to scbus0
Trying to mount root from ufs:/dev/ufs/pfsense0
ROOT MOUNT ERROR:
If you have invalid mount options, reboot, and first try the following from
the loader prompt:
set vfs.root.mountfrom.options=rw
and then remove invalid mount options from /etc/fstab.
Loader variables:
vfs.root.mountfrom=ufs:/dev/ufs/pfsense0
vfs.root.mountfrom.options=ro,sync,noatime
Manual root filesystem specification:
: Mount using filesystem
eg. ufs:/dev/da0s1a
eg. cd9660:/dev/acd0
This is equivalent to: mount -t cd9660 /dev/acd0 /
? List valid disk boot devices
Abort manual input
mountroot> “
I’m glad you found a way to interrupt the boot loader.
The error you are getting looks like what happens when the loader options have not been set correctly. (Step 4 the first time, step 6 for subsequent reboot)
There is another tutorial for this on the pfSense website, here:
https://doc.pfsense.org/index.php/Install_pfSense_nanobsd_2.0_to_thumb_drive
hi i have a question: can i use the Yawarra Rident embedded image on APU3B2 with the intel NICs?
Our APU Rident image was built for the APU 1, so although it may work on the APU 3, it will require a reassignment of ports. However, as we have not tested this, you could get unexpected behaviours (read: errors or bugs) also. The last Rident image is based on a relatively old version of pfSense so if you wish to use the APU 3, we’d recommend using the current version of pfSense, rather than Rident.